Pages

Sunday, November 28, 2010

Hubbards hubbards everywhere

The yard-eating squash vine!
The baby Hubbard squash that took over the yard this summer left me with over a dozen fruits of varying size.  Right now the small ones are in a produce cart and the larger ones are collecting dust on the floor in the basement.  I figured it was time to start looking up some new recipes for these sweet, nutty, and flavorful winter squash.  In my search, I found so many fabulous recipes I decided to create a new post dedicated to winter squash recipes.

The first one I am trying out this afternoon is for a Hubbard casserole.  I don't have any bulgur flour, so I'll be using regular flour, the mozzarella will be substituted with Parmesan, almond meal for the bread crumbs and the coconut oil will be substituted with olive oil, as these are the ingredients I have on hand.

I cut one of the large squash in half, scooped out the seeds, some of which I will roast, and some of which I will save for the garden next year.  I cut up one half into nice little cubes for the casserole, and was still left with one large half squash.  It is in the oven as we speak, roasting at 350 degrees.  I will be making Winter Squash Puree with Shaved Parmesan for lunch tomorrow.

One of the baby Baby Hubbards back in June.
And this beauty, I could eat this all day every day for the rest of my life!  I am thinking of making this for Christmas, because tarte tatin is a "sometimes food".   Wouldn't it be delicious with pumpkin pie spice in the caramel?  mmm!

A lot of the recipes I found call for butternut squash, which gets the most culinary attention, probably do to the fact that it does not have warts and bumps or grow freakishly large.  Hubbards substitute well for butternut.

Squash are a great food to cook with because they can straddle the spectrum from sweet to savory with ease.  They are nutritious, filling, and incredibly inexpensive.  I'm happy to have a basement brimming with Hubbards and spaghetti squash (which I also grew in the garden this summer).  Between the squash and a freezer full of chickens and turkeys from the farm, we are pretty set for some amazing winter comfort foods.  Stay tuned!

Thursday, November 4, 2010

Sensitive to frost

I feel a bit like the poor okra standing in the garden, leaves crumpled and black with flower buds still bravely trying to open, despite the frosty evenings we've had this week.  It was so glorious this summer, tall and strong and massively productive, but as the days got shorter and the weather got colder, the poor okra started to wither and fade.  What is it about the lack of daylight, the leaves falling lazily from the trees, and the crisp fall air that makes me want to hang my head and cry?  With that first frost, a little part of me died, right along with the okra and basil. 

Thanks to some quickly constructed low tunnel hoop houses, my Swiss chard and lettuce should continue on through mid-winter, although this is my first year to try extending the season, and I'm not sure at all what I am doing.  I am pretty sure, however, that that's the only thing keeping me from completely collapsing under the weight of the impending winter.  That, and the gardening books and seed catalogs that I have already started devouring in earnest.  I only need to make it to February, when I can start seedlings in my basement, and then to March, when I can plant cold weather crops under my tunnels.  Until then, time will be spent adding layers of yard trimmings to my lasagna garden, building a salad box, sewing new gardening aprons and harvest baskets, and dreaming, scheming, and planning for another abundant gardening season in 2011.  R.I.P. tender plants, I did love you so.

Tuesday, October 19, 2010

Fresh from the public library: a vegetarian crockpot cookbook

In the past, if I wanted to try a new cookbook, I'd just order it from one of my favorite online stores, but ever since I started working part time, I've had to curb a few extraneous expenses.  This isn't a bad thing at all, since I've actually found more enjoyment out of working my way through cookbooks I already own, exploring the wealth of recipes on the internet, and now, checking out new cookbooks from the public library.  Fresh from the Vegetarian Slow Cooker by Robin Robertson is currently sitting open to page 124: No Hurry Vegetable Curry, which I plan on putting together tomorrow morning.  This cookbook is full of some amazing looking recipes that I can't wait to try out.  It is due back to the library on November 6, which gives me just a few weeks to try the 10 recipes I've flagged.

One thing I'm not quite sold on yet is the technique of pre-cooking some of the veggies before they go in the crockpot.  The book says it really enhances the flavor, but realllllly?  The thought of cooking onions and carrots tomorrow morning makes my stomach turn.  Sure, I could do it tonight, but the whole idea of the crockpot is to plop everything in, flip the switch, and walk away...like a skilled villain in a good action movie, without the shards of glass and screaming...

Anyway, I am looking forward to tomorrow night's dinner of vegetarian curry with garlic naan from Trader Joe's.  After all, this whole exercise is being performed so I have something to scoop with my naan! 

Who else cooks a main dish to accommodate the bread?

Monday, October 18, 2010

Learn to Cook Lesson #1: Inspired by the pleas of a new cook...

Tonight I made a Swiss chard and Hubbard squash gratin with a coconut milk bechamel sauce, based loosely on a recipe I found on a cute blog.  I posted what I was making for dinner on my Facebook page, and almost immediately had this response:

"Lori I'm starting to cook but I can not even begin to pronounce half of your ingredients let alone find them in Montana. I need a menu that someone of my caliber can tackle - any suggestions?"

This inspired me to start a series of blog posts for the beginning cook.  You know who you are...your Mom/Dad always tried to get you to learn some cooking skills but you were too busy with basketball practice, watching TV, washing the cat, etc.  Or maybe your parents didn't cookWhatever the reason, here you are, needing to make a meal and not having any clue how this whole cooking thing is done.  In part, I blame Food TV, because most of the shows are on people eating food, and the shows where people are cooking food deal with ingredients like octopus liver.  It seems intimidating and overwhelming.  Not only do you have to know how to cook something, but you need to find a recipe, gather the ingredients, set aside the time...awwwww screw it, let's order Chinese!  But I promise that you don't have to be anyone special to be able to put together a really delicious meal.  Everyone starts from the same place, they really do.  


First of all, there are some tools that you absolutely MUST have to be a successful home cook.  The first of these is a good knife.  I received a J.A. Henckel santoku chef's knife as a gift many years ago, and words cannot describe how much easier everything is when you finally have a good knife in your hands.  I recently purchased a 4" chef's knife to match, and am finding that I could really use a paring knife as well.  But, these things are very expensive, so I would recommend starting with a 8" chef's knife.  Go to a cooking store and tell them you are a beginning cook and you want a good quality chef's knife.  They will pull out their collection for you to handle.  The knife should be heavy and well-balanced, and feel comfortable in your hand.  Henckel is my choice, but it may not be yours.  I would definitely recommend handling these in person before purchasing--it is an investment.


The second "tool" you need is a very basic cookbook that will have basic instructions for how to boil, bake and steam any kind of vegetable and meat.  It needs to have a basic sauces section, a primer on beans and grains, and pictures are a MUST.  My #1 recommendation is the Better Homes and Gardens Cookbook.  It is my go-to reference.  Do you think I just learned how to make a bechamel sauce from thin air?  Nope, BHG cookbook, baby!  This cookbook also has a nice section on selecting cookware, so I'll save myself the typing and let you read it for yourself.  Check it out from the library if you don't want to buy it right away.


My third MUST have tool for the home cook: the crock pot.  It is a miracle.  They come in all sizes and all price ranges.  I have one from a garage sale that holds about 6 quarts.  I use it several times a week for everything from whole chickens to fish in foil packets to pots of soups, stews, chili, and beans.

Ready for your easy meal #1?  Here's one of my stand-by recipes for when I want a hearty meal that tastes good and doesn't much effort at all.


Baked Chicken in Pasta Sauce
  • Ingredients: jar of your favorite pasta sauce, boneless skinless chicken breasts, shredded mozzarella cheese
  • You will need a 9x13 baking dish, preferably glass or ceramic (not metal).  Preheat the oven to 350 degrees.
  • Put raw chicken breasts in pan, cover with pasta sauce, top with shredded cheese.  Bake for 45-60 minutes, or until the chicken is tender enough to pull apart with a fork.
  • 20 minutes before the chicken is done, start boiling some water.  10 minutes before the chicken is done, boil some pasta.  
Serve the chicken with sauce over pasta.  For a side dish, microwave one of those steamer bags of broccoli/cauliflower (whatever you like, just make sure you balance out your meal with a fresh veggie that isn't a starch like corn).


If you have a crockpot, put the raw chicken in the crock, cover with sauce, and cook on low for 8 hours.  You don't even have to thaw the chicken--just make sure to never put frozen ANYTHING in a hot crock or you risk cracking it (cold food, cold crock)


Wednesday, October 13, 2010

Sticky sweet oddities: Cantaloupe Jam

The fridge is so full right now.  We are lucky in that regard, but it makes it awfully difficult to find a nice big spot to put a crock of marinating fish.  The old cantaloupe that I got for $1 at the veggie stand needed to go, but I hate throwing away food, especially if it might still be good.  I was in serious doubt, since there were soft little patches all over it, but it hadn't turned fuzzy, so I sliced it open.  It was actually perfect, sweet and juicy.  Knowing that we probably wouldn't eat it all up and it would spoil even faster being cut, I decided to get adventurous and try turning it into jam.  It worked, and now I have three beautiful jars of jam cooling on my kitchen counter.

Cantaloupe Jam
1 medium to large cantaloupe
1/2 cup orange juice
lemon zest, to taste
1 tbsp lemon juice
1 1/2 cups sugar


Remove the rind and seeds, cut the melon into chunks, and puree using a blender or food processor.  Add all ingredients to a heavy pot or large saucepan, and let simmer, stirring frequently, until the mixture has a jelly-like consistency.  I scooped some out periodically and put the spoon in the freezer to let it cool to see what the consistency was like.  When you get it where you want it, fill your jelly jars, leaving 1/2 inch headspace.  Place lids and rings on jars and boil in a boiling water bath for 10 minutes.


Sunday, October 10, 2010

Moist Pumpkin Muffins with Pepitas

Last weekend I opened up a large can of pureed pumpkin and used some of it for the baked oatmeal, and all week long I have been trying to decide which delicious recipe I would choose to use up the rest of the pumpkin.  The winner?  Moist, spicy, pumpkin muffins:

This recipe will make 12 large muffins, 18 medium muffins, or 30 mini-muffins

INGREDIENTS:
1 ½ cups flour (I used 1 cup all purpose and ½ cup whole wheat)
1 teaspoon baking powder
½ teaspoon baking soda
½ teaspoon salt
2 cups pumpkin puree (this is more or less a 15 oz can)
1/3 cup canola oil
2 large eggs
1 heaping teaspoon pumpkin-pie spice
½ teaspoon ground ginger
½ teaspoon nutmeg
1 cup sugar
1 cup pepitas (shelled pumpkin seeds, or any other kind of nut) (optional)


DIRECTIONS:

Put oven rack in middle position. Preheat oven to 350F. Put liners in muffin cups or spray with non-stick cooking spray.
1. Whisk together flour, baking powder, baking soda and salt in a small bowl.
2. Whisk together pumpkin, oil, eggs, pumpkin-pie spice, cloves, nutmeg, and sugar in a large bowl until smooth, then whisk in flour mixture until just combined.
3. Fold in the nuts.
4. Divide batter among muffin cups (each should be about 3/4 full).  Bake until puffed and golden brown and a wooden pick or skewer inserted into center of a muffin comes out clean, 25 to 30 minutes for regular muffins, 15-17 minutes for mini-muffins.


Cool in pan for 5 minutes, then transfer muffins to a rack to finish cooling.  Serve warm. 

Wednesday, October 6, 2010

A favorite recipe and a new discovery: Now bubbling in a kitchen near you!


I wanted to make one of my favorite easy supper recipes today, but I didn't have any condensed cream of "x" soups on hand.  While I was out running errands I thought I would pick some up, but at $1.75 per can for Campbell's, I was sure I could find a substitute.  I made my way to Trader Joe's, and they didn't have any condensed soups at all, so I picked up a carton of sliced cremini (baby portabella) mushrooms and decided I would make my own, after all, it is just a cream soup!  After making this, I don't think I'll ever buy another can of Campbell's again.


Condensed Cream of "X" Soup

(Makes 12 cups, or about 8 cans)
  1. In a large stockpot, sautee 3 cups of finely chopped veggie "X" until very soft, or chop up chicken or other meat into very small chunks.
    • Add garlic powder, thyme, oregano, ground coriander seed, celery salt, onion powder, pepper and salt to taste
  2. Add 6 cups of veggie broth or chicken broth (I use my own homemade versions) and 2 cups of milk (I used lowfat).  Bring this mixture to a boil
  3. In another bowl, pour in 4 cups of milk.  Slowly whisk in 3 cups of flour to get a very thick suspension without lumps.  
  4. Add flour/milk mixture to the boiling broth and stir until the soup thickens to a nice consistency.
You can freeze this in 1.5 cup portions, which is equal to about 1 can. 

Here's what I made with my new condensed soup mix.  This is a favorite recipe that came from my Grandma Lil, and which my Mom makes all the time.  You can make this with any meat, and can use bone-in or boneless versions with equally delicious results.  My Mom browns the meat before putting it in the dish, and adds the drippings to the rice.  I don't have the patience for that, so I just pile it all in and walk away.  Hers is better, but I don't know if that is because Mom's food always tastes better for some reason, or if it has to do with the browning. 

Chicken and Brown Rice Casserole
Spread 2 cups of uncooked brown rice on the bottom of a large casserole dish.
Lay uncooked chicken on the rice layer.
Sprinkle with a package of Lipton's Onion Soup Mix
Mix two cans of condensed cream of mushroom soup with 4 cups of water and pour over the chicken and rice.
Bake for 1.5 hours at 350 degrees.

Sunday, October 3, 2010

Foodie Blogroll Giveaways: Mohawk Valley Trading Company

Foodie Blogroll has partnered up with Mohawk Valley Trading Company, and for the next 4 weeks, 8 lucky winners will receive jars of their delicious raw honey!  I'm not just selling out so I can be entered to win some of their amazing products.  Mr. JP and I eat raw honey all the time, but our current supplier filters their honey which removes most of the beneficial propolis, beeswax, and pollen.  The price on this honey is really good, too, at $10 for a 1 lb. jar.  Buying honey made in the USA helps support local beekeepers, a critical component of our agricultural success.

From the Foodie Blogroll Contest Page:


About Mohawk Valley Trading Company:
The Mohawk Valley Trading Company offers the highest quality organic and unprocessed natural products they can produce such as maple syrup  and raw honey.
Raw honey contains all of the pollen, live enzymes, propolis, vitamins, amino acids, antioxidants, minerals, and aromatics in the same condition as they were in the hive.
 
The  Adirondack Wildflower Honey is certified pesticide-free and they offer 2 types: Summer and Autumn.
 
The Prize: 
There will be 8 winners (2 per week) who will receive one jar of Adirondack Wildflower Summer Honey and one jar of Adirondack Wildflower Autumn Honey, for a total value of value $20.00.
 
To order your own Raw Honey:
Visit Mohawk Valley Trading Company at http://www.tenonanatche.com

Give me the coffee and no one gets hurt

It has been a busy week.  I've been running on adrenaline and jet fuel trying to get everything done.  My sister's birthday is coming up soon, and I'm trying to put together a little package of gifts that I've made.  Herein lies the problem.  Sewing and crafting is a lot like cooking.  You have to have all the ingredients, and you have to know a little bit about what you are doing.  Every time I think I have everything, I find out there's one more piece of the puzzle that I'm missing.  If I could just have a sewing store in my basement, this would all be a lot easier.  I'm a novice at sewing, meaning that I just started teaching myself a few months ago, so the thought of giving someone a gift that I've sewn feels a little like I'm handing out macaroni necklaces. 

If only Baked Pumpkin Pie Oatmeal with Crunchy Cinnamon Crumbles would survive thousands of miles of travel, my worries would be over.  Mr. JP and I made this yesterday morning.  We have both been running on empty this week, so we had a nice sleep-late followed by a delicious hot breakfast.  The recipe says that this is best the first day, but we both thought the texture was better this morning when we ate it as leftovers.  It became a lot like a delicious bread pudding, but the cinnamon crunchies did get a little soggy, so if you want that first-day-crunch, put it under the broiler for a minute before serving.  I love this recipe, and I think it would adapt very well to different fillings.  Next time I am going to use up some ripe bananas and add walnuts in lieu of raisins.  I think it would also work well with applesauce (reduce the liquid to compensate) and those delicious little wild Boreal blueberries. 

That's all for now.  I need to head out to the Farmer's Market and hit up the fabric store on my way home so I can continue making macaroni necklaces for my dear sister!  I hope she likes them!

Saturday, September 25, 2010

Gremlins in the bread machine

Lately I've been renaming bread machine recipes with a few of my own choice words.  This most recent loaf rose up over the top of the bread pan and burned itself to the inside of the bread machine while baking.

Bread machine baking lessons:
  • Peanut flour turns bread into inedible chunks of sour, rock hard badness.
  • When a recipe calls for 1 1/2 eggs, you better figure out how to make that chicken lay a half an egg.
  • Vital gluten is usually a really good thing for whole wheat loaves, as it makes them fluffier.  However, this is apparently a "use at your own risk" ingredient. 


I had to break the loaf to get the pan out of the machine
I will try this recipe again, as it looks like a good portion of the loaf is edible, and it seems like a nice light wheat bread, which is what I have been trying to get.  The recipe, Whole Wheat 1, comes from The Bread Machine Cookbook by Donna Rathmell German.  Next time I will not add vital gluten.  If it makes the kind of loaf I've been looking for, I'll post the recipe.  But until then, just assume that there continues to be something gnawing on the wires in the bread machine.

Hello? Autumn, are you out there?

I've been ready for apple cider, chunky sweaters, wood fires and an excuse to bake pies and make soups for over a month.  A few days ago there was a little chill in the air, and a few leaves on the trees are starting to turn color, but that hot, still air that was smothering me today sure didn't feel anything like fall!  Regardless, I've been cooking away and experimenting with all kinds of new ingredients.

Don't try this at home
Trader Joe's is now selling peanut flour, which has a lot of protein and very little fat.  Mr. JP wanted to try some since he's boycotting any commercial protein powders due to their heavy metal content.  Knowing it wouldn't act like regular flour, I wondered how I could incorporate it into the bread I bake each week.  I added about a cup of peanut flour to the regular recipe, and cut the regular flour down a bit.  I knew I was in trouble when the bread machine was hacking away at trying to knead it.  When the loaf came out, it was so deformed I just had to laugh.  Mr. JP, who will eat anything, said he would still use it for sandwiches, even though it had a sour flavor and was hard as a brick.  Questioning his judgment, I kept the loaf, and he reported the next day that he wouldn't be able to eat it, afterall!  I've tossed it in the freezer in the hopes that I might be able to pulverize it and use it for bread crumbs or as a stuffing. 


Kasha breakfast cereal with Boreal blueberries and cream
Meanwhile, being tired of the same old breakfast of oatmeal with bananas day after day, I decided to cook up the kasha (toasted buckwheat) that I got from the bulk bins at the co-op.  It has such a nutty aroma as it is cooking!  I tried it as a breakfast cereal, and while it was flavorful, it won't become a staple.  I had a lot left over which I used to make a chicken broccoli "rice" casserole, and it was perfect for that!
How to cook kasha:
1 c. kasha (toasted buckwheat groats)
2 c. water
Rinse the kasha and slowly add to boiling water while stirring.  Turn the heat to medium-low and cover.  Let the kasha cook for 10-15 minutes.  Don't overcook it.  I have the feeling it would turn out mushy.

I have to say, these little wild Boreal blueberries from Trader Joe's have a really nice flavor!  They look like the huckleberries that I used to pick on Blue Mountain in Missoula, MT.  I'm sure they would work as a huckleberry substitute in a cheesecake or muffins.  Disclaimer: there is no real substitute for fresh huckleberries picked off the side of a mountain, and cooked up into a rich, sweet sauce the same day, but if you live anywhere else you are just going to have to make do.

Jack Be Little miniature pumpkins
Bad Dog has been helping me out with finding a use for all the mini pumpkins I planted.  I had read that mini pumpkins were edible, and I was very excited to grow the cute little white and orange varieties I see in the supermarket every fall.  I cooked up a bunch of them several weeks ago, and while they are technically edible, they are very fibrous.  The work it takes to cut them open and scoop out the seeds is not really worth it when all you get in return is a fibrous pulp that doesn't really have much flavor.  Mr. JP insists that we can't waste them, so I will cook them all up, scoop out the flesh, chop it in the food processor and freeze it.  But if Bad Dog wants to help whittle away at the pile, this is one crop I am more than willing to share with her.

Thursday, September 16, 2010

Polenta is not Italian for dog food

Bad Dog seems to have an eating disorder.  On Monday morning she ate my bacon behind my back, and later that same day, she helped herself to a beautifully prepared and delicious pan of warm polenta.  It's not that I am neglectful--I drug her from the kitchen into the living room while the polenta was cooling and thickening on the counter because I knew she seemed too interested...but...Bad Dog has a way of silently slipping away and it is only when things become too quiet that we realize she has ninja'd her way into the kitchen.  I cried.  The first time I had ever made polenta and it was thick, creamy, loaded with goat cheese, and coated in dog slime.  Bad Dog learned the English phrase, "I'm going to kill you!" that day.  Polenta...Take 2.

Crispy Polenta with Goat Cheese, Roasted Garlic, and Roasted Red Peppers
1 c. corn grits
4 c. liquid (I used homemade chicken stock, some cream, and water to add up to 4 cups)

Boil the liquid (if you are using a milk base, do not let it scorch) and slowly add in the grits while stirring constantly.  Keep stirring until the boiling resumes, then lower the heat to medium.  Stir until the mixture is thickened.

Add the goat cheese and season to your liking.  Pour into a 9x13 baking pan.  It will continue to thicken and firm up as it cools. 

Take dog with you and sit in living room to relax after making such a wonderful polenta.  Relax...realize dog is in kitchen eating polenta.  Threaten dog to within an inch of her life (but do not actually harm her or you will experience bad karma and jail).  Cry.  Gchat with Mr. JP for moral support.  Return to step 1.

Meanwhile, roast a head of garlic.  When the polenta has cooled enough, cut it into squares and fry each one in oil (or put under the broiler to get the top nice and crispy).  Top with roasted garlic and slices of roasted red peppers, and crumble more goat cheese over the top. 

Sunday, September 12, 2010

Bloggycat's paw paws and grilled polenta cakes

I'm getting a nice list of really cool blogs to follow, don't you think?  I feel like a copycat, or in this case, a bloggycat, but these fantastic bloggers just have the BEST ideas! 

The amazing Paw Paw fruit
In the spirit of Poor Girl Eats Well, I decided to see what I could do for a few bucks at the food co-op and farmer's market this weekend.  Of course, having Mr. JP with me always seems to make the bill go up (not because he puts things in the cart, but because he is a good partner in crime!), so we weren't able to come even close to the $25 shopping cart, but we got some pretty neat stuff from the bulk bins and the farmer's market.  The thing that really busted the budget: paw paws. 

Our favorite fruit, not sold in stores because of their extremely short shelf-life, easy bruising, and their need to ripen completely on the tree (so they can't be shipped raw and gassed later), shows up this time of year for about one week, and then it's a long, long wait until we can have more of the tropical tasting custard-like fruit.  So, of course, we bought every last paw paw and some paw paw cake, along with Honey Crisp apples, peaches, and some Asian pears.  I have a weakness when it comes to locally grown fruit.  Good thing Mr. JP had a few extra bills in his wallet!  What I did get for cheap, though, was a whole bunch of different colored sweet peppers, and a few blazing inferno hot peppers for my salsa and green tomato pickles.  I could have walked out of the farmer's market for $4 if it hadn't been for those paw paws!

I've been seeing a lot of recipes for polenta recently, and I really want to try my hand at making it, but none of the recipes seem to be too clear on whether I should use cornmeal or corn grits.  I looked for something like a box that said "Polenta" on it at the store, but didn't see anything other than Bob's Red Mill corn grits that said it was also known as polenta (and also known as "Holy Cow that's expensive grit!")  So when I was at the co-op, I got some corn grits.  I'm going to try my hand at making Grilled Polenta Cakes with goat cheese (minus the caramelized onions because I forgot to buy onions).  I hope they turn out well enough to cut out of the pan and fry up to get that crispy crust on them!

It's much easier being green

It seems like by the time the tomatoes get ripe, they are already starting to rot in places or they are infested with worms.  I've had it with wasting my time any longer and have decided to ransack the bushes for the green fruit.  I have a few projects up my sleeve, but the first one was for green tomato dill pickles.  Pickles are one of my very favorite foods.  I could eat just about anything in pickled form, and I was planning on putting up many quarts, but since the pickling cucumbers got devoured by "Audrey" the squash vine, I thought I would just have to wait until next year to start over again.  Here's where a blessing called "bad ripe tomato luck" and a Google search came in!  Here's a link to the original recipe, and my modifications are listed below:

Kosher Dill Green Tomato Pickles
The brine:
3 3/4 c. water
3 3/4 c. vinegar (5%)
6 tbsp pickling salt 
Put this in a saucepan and let it come to a boil

Slice up:
Green tomatoes
Sweet Peppers
Onion
Carrots
Celery
Hot peppers (Optional)

Add several cloves of sliced garlic to the bottom of your jars and start to pack in the veggies.  Stuff a few sprigs of dill in, and fill the jars with the boiling vinegar solution.  Leave about 1/2 inch of head space.  Put lids on and process in a hot water bath 10 minutes for pints and 15 minutes for quarts.  Pickles will be ready to eat in 4-6 weeks.

I had a little brine left over, as well as some diced veggies, so I just tossed them all together and let it sit on the counter for a quick little pickling session.  The first taste left some fire on my lips and a pucker in my cheeks, so I think this is going to be a pretty good batch!

I plan on using this mixture in sandwiches.
Everything floated to the top, which won't earn me a blue ribbon, but I'll put the picture in anyway!

Tuesday, September 7, 2010

Trouble with muscle food

Mr. JP has a healthy obsession with weight lifting and nutritional supplements, but today he found out that his most recent purchase of protein powder is actually laden with heavy metals like lead and cadmium!  I think this has him convinced to try to get most of his protein from food sources instead of powders and supplements.  We eat a lot of protein in our diets already, but since this man can eat us out of house and home, we are going to be needing some cheaper sources of protein than the farm-raised chickens and eggs we get from Jehovah Jireh Farm.  It's a good thing beans are cheap, and I'm learning how to sprout them for even more tasty possibilities!  My very first sprouting experiment: chickpeas.  I ate my first little baby sprouted chickpea today, and it was absolutely delicious.  It tasted just like a tender young pea from the pod--one of my very favorite foods!  Hopefully, eating sprouted raw foods will help counteract the pie we had for breakfast, lunch, and dinner over the holiday weekend!

Pictures will come in a few days.  I've been having trouble with Mac vs. Canon, so Mr. JP bought me a new handy dandy device that will let me get my pictures to the computer a lot easier.  It probably has lead in it, but we're not planning on putting it on the dinner plate any time soon!

Sunday, September 5, 2010

Seeing the world through raspberry colored glasses

Yesterday Mr. JP and I went out to our favorite pick-your-own orchard.  We spent a sunny morning in the raspberry fields filling up our two little quart containers, which I found out after about 10 minutes was not nearly enough to satisfy my industrial-picking-mode mindset!  Mr. JP just leisurely strolled along the rows picking only the very best berries, with careful consideration on each one that would make it to his basket, while I worked quickly down the rows picking everything that resembled ripe and not already nibbled on.  That just demonstrates our two very different personalities.  We will be eating his berries for anything requiring fresh, and mine will be perfect for making jam.  Don't tell Mr. JP, but I'm going to need a few of his perfect berries for the jam, too!

We went there for peaches and apples, but I didn't read the website carefully enough...they don't even have peach trees, and the apples will be ready for the first picking next weekend.  Oh well, looks like we'll have to make another trip!  They have fresh milk and cream from a local dairy where the cows are grass fed.  The milk tastes so fresh, smooth, and light, and it comes in glass bottles...swoon!

Thursday, August 26, 2010

Resurrected Brown Rice

Considering that I haven't been feeling well today, I thought I would post an old note from my Facebook archives with a recipe for brown rice pudding.  I've become better at making rice, but I still rely much too heavily on my rice cooker if I want a nice batch of fluffy rice with separate grains.

September 16, 2009
So...I've never been able to make a decent pot of rice, and last weekend was no exception. I followed the directions on the bag, and still, at 45 minutes I had hard nuggets in water, and 20 minutes after that I had glue. Well, if you can make lemonade with lemons, you can do something with a horrid pot of inedible brown rice, right? RIGHT! Not much goes to waste in this house.

Resurrected Brown Rice Pudding:
Cooked brown rice (or overcooked...whatever!)
1 can of light coconut milk (or evaporated milk if you wish)
Raisins
Cinnamon
2 over-ripe bananas, mashed
Splash of vanilla

I just heated everything up until it was thick, bubbly, and the raisins were nice and plump. There was no need to add any additional sugar. The bananas and raisins gave it the perfect amount of sweetness.

Tuesday, August 24, 2010

The Grasshopper and the Ant

Remember the story of the grasshopper and the ant?  I have been feeling very "ant-like" lately, scurrying around with the summer crops and storing my food for the winter.  Today after work I came home and took care of 9 of my little red beauties (tomatoes).  They go bad so fast when they have been ripened on the vine, and the smell of a rotten tomato is one of the worst smells that can come from the veggie world.  Here is a tutorial on preparing tomatoes for the freezer:

Pick your red beauties and wash them well.  I use a little scrubber and gently scrub around the stem.  My tomatoes have all grown with large cracks around the stem this year, so I make sure to scrub thoroughly to get any dirt out of the blemished areas.  We are going to blanch the tomatoes, which sounds fancy but is the easiest cooking skill to master, as long as you know how to boil water.  Put a large pot of water on the stove and get the water boiling (don't fill it too full or you will overflow when you put the fruit in).  Make an ice bath in a large bowl, and set it next to the stove (or as close as possible). 

When the water has come to a rockin' boil, gently drop the tomatoes in one by one.  I like to put each tomato on a slotted spoon and lower the spoon in so I don't have any cannonballs splashing boiling water on me.

Boil the tomatoes for about a minute or so.  Their skin will crack, and that's when you know they've had enough of the boiling inferno.


Remove them with a slotted spoon and drop them into an ice bath.

You've done it!  You are now a master of blanching, which can be done to almost any fruit or veggie (and makes a delicious, tender asparagus, I might add).

At this point, you need to remove the terrorized tomatoes from the ice bath (I watered my flowers with the cool water so I could use the bowl for the skinned tomatoes).  Their skins will slip right off.  Core out the stem and any blemishes or bad spots.  I like to do this over a bowl to catch the juice.

Don't they look just like what you get in a can from the store?
Now you have the option of what kind of tomato product you would like to freeze: whole, diced, crushed, or juice.  I did diced tomatoes this time, since I did a batch of crushed a few days ago. 

I filled two quart-sized freezer bags until there was about 1 1/2 inches of room left at the top (this is called head space).  This leaves enough room for the tomatoes to expand when they freeze and they won't burst through the bag (which is just fine in the freezer, since they are already solid, but makes a terrible mess when you want to thaw them...how do I know this?!).  Label and date the bag, and lay them flat in your freezer.  You can put them on a cookie sheet if you don't have a level surface in the freezer.  Freezing the bags flat allows you to tip them on end and cram in a lot more ice cream!

Voila!  Diced tomatoes, from vine to freezer in less than 60 minutes.

Monday, August 23, 2010

Bountiful Harvest

This is the first summer for me in the new house, and all winter I was dreaming about the garden I would create in the back yard.  I tried a new concept (for me) called square foot gardening, and had tremendous success!  With only six 4'x4' raised beds and a load of Leafgro compost, we managed to raise a garden that has produced probably over 100 pounds of vegetables.  Last weekend I tore out all of the non-producing crops and diseased squash vines so that I can start over with a second season planting of fall vegetables.  It may be a little late in August, since we have a 50% chance of a 28 degree kill frost by November 1, but I'm keeping my fingers crossed.

I really wanted to preserve our harvest through canning, but we purchased a freezer this spring for keeping meat (sadly, our free freezer from a rummage sale was a dud that ran great but never got cold).  This left little money in the budget for start-up supplies for canning, and religiously searching Craigslist and rummage sales has not yielded any significant gains.  I'm guessing this economy has forced those with stockpiles of canning jars and a pressure canner to dust them off and put them to good use. 

Here is a list of our crops:

Swiss Chard: I let it go during the hot months and cut it all down to the ground this weekend.  It is already making a comeback

Gurney's Sweeter Yet Hybrid Cucumbers: approximately 75 cukes, so sweet and crisp, no matter how big they got.

Green Beans: This crop was something of a failure.  I diligently picked them as they came on one by one, and got tired of going through every plant daily to search for the one or two beans that had matured.  I gave up for about a week and a half, and the beans had exploded and gone to seed.  I picked everything at once, but most of the beans were too tough to eat, and the plants started to die back.  Better luck next year!

Salad Mix: More than we could possibly eat, and more than the in-laws wanted to take with them every time they came over!  The last harvest was so huge it filled a giant shopping bag completely full.  Two huge sink loads of washed lettuce later, we took a bite and threw it all away.  It had gotten too bitter with the hot weather.

A baby Baby Hubbard
Spaghetti squash (note that it is as long as the trowel)
Our most plentiful crop was the squash.  We planted baby hubbard and spaghetti squash, and two varieties of mini pumpkins (which are edible): Baby Boo (white) and Jack Be Little (orange).  I painstakingly wrapped the base of each plant with aluminum foil to prevent squash vine borers and squash bugs from decimating the crops.  I picked eggs off of the vines religiously, and killed every moth I could get my hands on, but eventually the bugs won.  I won't complain too much.  They may have taken down the vines, but only after giving us a bountiful harvest.


Cantaloupe the size of softballs proved to be the sweetest with firm flesh.  They were the perfect single serving fruit size.  We also grew little Sugar Baby watermelons with the same sweet success.  We cracked open the first watermelon when my Mom was visiting.  She and I took a picnic to Mount Vernon and ate watermelon along the banks of the Potomac one afternoon.  It was a memory I'll never forget.

Bad dog!  She does this to get attention
Here are some more pictures.  This is our Bad Dog who loves to provoke us by standing in the garden.  She looks at us and waits for us to stomp our feet, then she takes off and runs circles around the yard!  She is too cute to be mad at for long.

 Mr. JP and the squash
Mr. JP named the squash plants Audrey, after the man-eating plant in Little Shop of Horrors.  The squash took over about half of the yard, and several of the neighboring raised beds.

Loads of sweet everbearing strawberries
We also planted strawberries along the patio early in the spring.  It was hard to cut off the blossoms for the entire spring, but since these are the everbearing variety, they had a second crop in mid-summer that we were able to harvest.  Cutting the blossoms off of new plants stimulates strong root development and leads to greater yields in the next season and hopefully, for next spring, as well.

Calendula is an edible flower


These beautiful flowers are called Calendula, and the petals are edible.  They are a hardy variety of flower and can also be used in herbal medicine.  A tincture or salve made with calendula is supposed to be good for the skin, and provides cooling properties.  I made an oil infusion from the petals and it has the most beautiful golden hue.  I will be making some lip balm with the oil this winter.


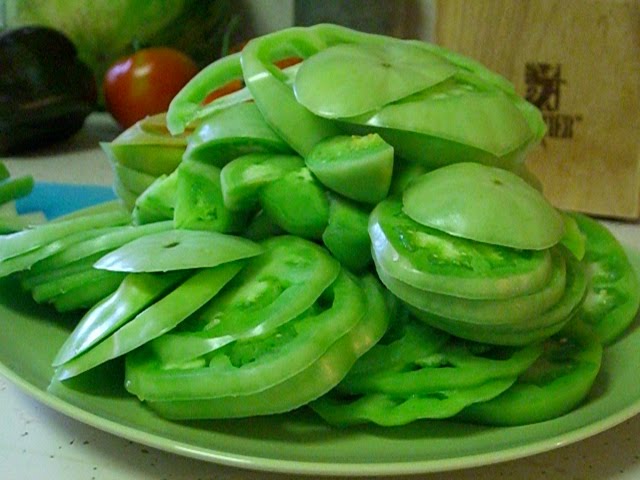
Eight Ball zucchini from a friend's garden, and cucumber salad (from my garden) in the background
This variety of zucchini, grown by a friend, are small and round.  They made a wonderful meal!  I came up with my own recipe, and it was to die for!

Stuffed Zucchini
Slice the squash in half and scoop out the seeds.  Gently place the squash in a pot of boiling water and cook until the flesh is tender.  Remove the squash from the water with a slotted spoon, and submerge in a bath of ice water (this stops the cooking process and allows you to handle the squash without burning the flesh off your hands, like I did.)

While the squash is cooking, saute some sweet onions until they are translucent, or go all the way and caramelize them for a sweet treat.  I added a bit of crushed garlic at the end.  Always add your garlic at the end of the recipe, as it burns quite easily and imparts a bitter, burned taste that will permeate the whole dish.  Dice up some tomatoes (it was early summer and cherry tomatoes were plentiful) and fresh basil, and mix with the cooked onions and garlic. 

Scoop the flesh out of the shell, taking care not to break the shell in the process.  Place scooped squash in a colander and press out the excess moisture.  Chop the flesh and mix with the onion and tomato mixture.  Add salt and pepper to taste.  Fill the empty squash cups with the mixture, top with crumbled feta cheese, and add a splash of olive oil and balsamic vinegar over the top.

Broil until the mixture is heated through and the feta has a lovely golden brown roasted look.

Bon apetite!

Sunday, August 22, 2010

Kooky Kuchen: A divinely delicious imposter

My Momma came to visit last weekend, and I've missed her so much since she left.  She gives me a cookbook almost every year for one occasion or another, and there is one that is my absolute favorite, if not for the recipes, then for the note she wrote in the front cover.  I pulled it out and started flipping through it to get some kitchen inspiration, and found a recipe for peach kuchen.  Kuchen is a German cake, kind of like coffee cake, with fruit and custard on top.  My Grandma Lillian makes the best kuchen, but since she lives several thousand miles away, I can't get any of the really good stuff!  I also realized after making this recipe that I am in desperate need of Grandma's secrets if I am to make the real deal.

This recipe is absolutely divine, don't get me wrong, but it is NOT kuchen as I know it!  It is a heavenly combination of upside down peach crisp/cobbler with cream.

Peach Kuchen 
from Recipes to Warm the Heart (recipe submitted by Twyla Zaske, Renville, MN)

2 c. sifted flour
1/4 tsp. baking powder
1/2 tsp. salt
1 c. sugar
1/2 c. butter (don't even think about the M word here, folks)
6 fresh peaches (I used frozen and it was quite yummy!)
1 tsp. cinnamon (who are we kidding?  I am a frugal woman, but not with cinnamon.  Load it!)
2 egg yolks
1 c. cream


After addition of cream
Sift flour, baking powder, salt, and 2 tablespoons sugar together.  Work in the butter until mixture looks like corn meal.  Place in a 9-inch square cake pan and pat an even layer over bottom.  Place peach halves on pastry.  Sprinkle mixture of cinnamon and sugar over peaches.  Bake at 400 degrees for 15 minutes.  Now, mix egg yolks and cream together; pour over kuchen.  Bake for 30 minutes longer at 350 degrees or until custard is set.  Serve warm.

Non, je ne regrette rien

"No!  I will have no regrets."  These words, sung by Edith Piaf, ring in my ears like both a ballad and a battle cry.  You see, since the days when I was but a child myself, I have known it to be true that I have no desire to have children.  What I have not always known is why, and consequently, I have not always embraced the thought.  

When I was young, my wild imagination let my dollies act as friends, and when playing house, the coveted position of mother was never sought.  I wanted to be an astronaut, a doctor, a pharmacist, a scientist, or perhaps, Annie Oakley.  I was a happy child, full of giggles and mischief, independent and strong-willed, but sensitive, nonetheless.  There has always been within me a love for animals, nature, and humankind.  I read wondrous tales of heroism and adventure, and longed to resemble my great-grandmother, Clara, in any way.  She passed before I had a chance to meet her, but the stories of her are grand, and the letters she left behind tell of a woman with spirit, ambition, intellect, sensitivity, style and class.  

For so many years it was hard to recognize what kind of woman I had become, for my focus was on defending my position to not have children.  I struggled with the concept and found myself trying desperately to want to raise a family.  The comments and criticism that came with my attestations left me angry, hurt, and confused.  Even more harmful than that, especially when I was seeking acceptance and trying to fit in with the adult world, was the stinging realization that I was not, and could not be, normal.  I was asked by strangers when I would get married and how many children I would have, to which I could not tell a lie.  It would have been easier to smile and answer with a socially acceptable response, but lying to others for the purpose of being accepted made me a traitor to myself.  So many times I was asked, and so many times I asked myself, "What kind of woman does not want to have children?"  It was as if I were a serpent-haired monster, a baby-eating devil.  For more than a decade, without knowing the answer to the question,  I was discontent, defensive, and robbed of certitude. 

Today, I am a woman who closely resembles her great-grandmother, albeit with a bit of a learning curve in the disciplines of style and class.  What I have found within myself is contentment in knowing the answer to the question: that one can possess the qualities that would make them a good parent, but that does not, by any means, require them to become one.  Without children, I am able to give my time, love, and attention freely to those in need.  My life is simple, serene, fulfilling, and genuinely beautiful.  Non, je ne regrette rien!