Pages

Saturday, September 25, 2010

Gremlins in the bread machine

Lately I've been renaming bread machine recipes with a few of my own choice words.  This most recent loaf rose up over the top of the bread pan and burned itself to the inside of the bread machine while baking.

Bread machine baking lessons:
  • Peanut flour turns bread into inedible chunks of sour, rock hard badness.
  • When a recipe calls for 1 1/2 eggs, you better figure out how to make that chicken lay a half an egg.
  • Vital gluten is usually a really good thing for whole wheat loaves, as it makes them fluffier.  However, this is apparently a "use at your own risk" ingredient. 


I had to break the loaf to get the pan out of the machine
I will try this recipe again, as it looks like a good portion of the loaf is edible, and it seems like a nice light wheat bread, which is what I have been trying to get.  The recipe, Whole Wheat 1, comes from The Bread Machine Cookbook by Donna Rathmell German.  Next time I will not add vital gluten.  If it makes the kind of loaf I've been looking for, I'll post the recipe.  But until then, just assume that there continues to be something gnawing on the wires in the bread machine.

Hello? Autumn, are you out there?

I've been ready for apple cider, chunky sweaters, wood fires and an excuse to bake pies and make soups for over a month.  A few days ago there was a little chill in the air, and a few leaves on the trees are starting to turn color, but that hot, still air that was smothering me today sure didn't feel anything like fall!  Regardless, I've been cooking away and experimenting with all kinds of new ingredients.

Don't try this at home
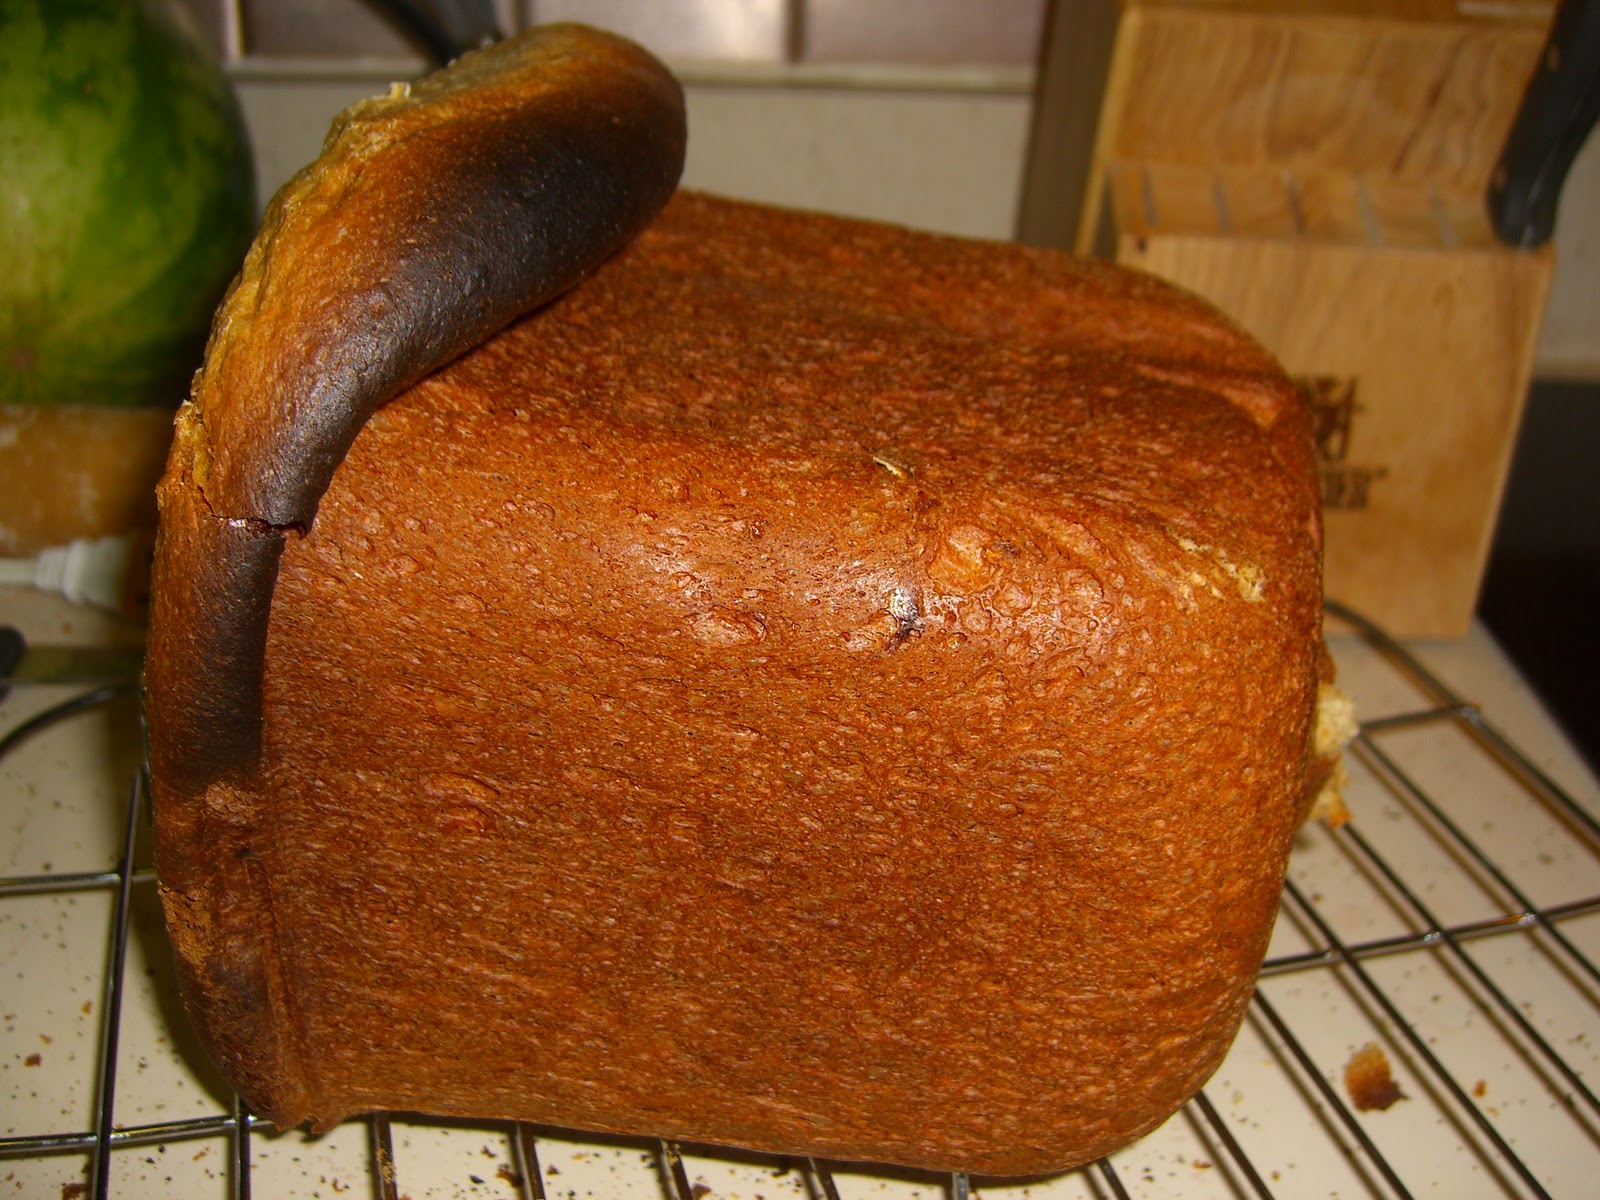
Trader Joe's is now selling peanut flour, which has a lot of protein and very little fat.  Mr. JP wanted to try some since he's boycotting any commercial protein powders due to their heavy metal content.  Knowing it wouldn't act like regular flour, I wondered how I could incorporate it into the bread I bake each week.  I added about a cup of peanut flour to the regular recipe, and cut the regular flour down a bit.  I knew I was in trouble when the bread machine was hacking away at trying to knead it.  When the loaf came out, it was so deformed I just had to laugh.  Mr. JP, who will eat anything, said he would still use it for sandwiches, even though it had a sour flavor and was hard as a brick.  Questioning his judgment, I kept the loaf, and he reported the next day that he wouldn't be able to eat it, afterall!  I've tossed it in the freezer in the hopes that I might be able to pulverize it and use it for bread crumbs or as a stuffing. 


Kasha breakfast cereal with Boreal blueberries and cream
Meanwhile, being tired of the same old breakfast of oatmeal with bananas day after day, I decided to cook up the kasha (toasted buckwheat) that I got from the bulk bins at the co-op.  It has such a nutty aroma as it is cooking!  I tried it as a breakfast cereal, and while it was flavorful, it won't become a staple.  I had a lot left over which I used to make a chicken broccoli "rice" casserole, and it was perfect for that!
How to cook kasha:
1 c. kasha (toasted buckwheat groats)
2 c. water
Rinse the kasha and slowly add to boiling water while stirring.  Turn the heat to medium-low and cover.  Let the kasha cook for 10-15 minutes.  Don't overcook it.  I have the feeling it would turn out mushy.

I have to say, these little wild Boreal blueberries from Trader Joe's have a really nice flavor!  They look like the huckleberries that I used to pick on Blue Mountain in Missoula, MT.  I'm sure they would work as a huckleberry substitute in a cheesecake or muffins.  Disclaimer: there is no real substitute for fresh huckleberries picked off the side of a mountain, and cooked up into a rich, sweet sauce the same day, but if you live anywhere else you are just going to have to make do.

Jack Be Little miniature pumpkins
Bad Dog has been helping me out with finding a use for all the mini pumpkins I planted.  I had read that mini pumpkins were edible, and I was very excited to grow the cute little white and orange varieties I see in the supermarket every fall.  I cooked up a bunch of them several weeks ago, and while they are technically edible, they are very fibrous.  The work it takes to cut them open and scoop out the seeds is not really worth it when all you get in return is a fibrous pulp that doesn't really have much flavor.  Mr. JP insists that we can't waste them, so I will cook them all up, scoop out the flesh, chop it in the food processor and freeze it.  But if Bad Dog wants to help whittle away at the pile, this is one crop I am more than willing to share with her.

Thursday, September 16, 2010

Polenta is not Italian for dog food

Bad Dog seems to have an eating disorder.  On Monday morning she ate my bacon behind my back, and later that same day, she helped herself to a beautifully prepared and delicious pan of warm polenta.  It's not that I am neglectful--I drug her from the kitchen into the living room while the polenta was cooling and thickening on the counter because I knew she seemed too interested...but...Bad Dog has a way of silently slipping away and it is only when things become too quiet that we realize she has ninja'd her way into the kitchen.  I cried.  The first time I had ever made polenta and it was thick, creamy, loaded with goat cheese, and coated in dog slime.  Bad Dog learned the English phrase, "I'm going to kill you!" that day.  Polenta...Take 2.

Crispy Polenta with Goat Cheese, Roasted Garlic, and Roasted Red Peppers
1 c. corn grits
4 c. liquid (I used homemade chicken stock, some cream, and water to add up to 4 cups)

Boil the liquid (if you are using a milk base, do not let it scorch) and slowly add in the grits while stirring constantly.  Keep stirring until the boiling resumes, then lower the heat to medium.  Stir until the mixture is thickened.

Add the goat cheese and season to your liking.  Pour into a 9x13 baking pan.  It will continue to thicken and firm up as it cools. 

Take dog with you and sit in living room to relax after making such a wonderful polenta.  Relax...realize dog is in kitchen eating polenta.  Threaten dog to within an inch of her life (but do not actually harm her or you will experience bad karma and jail).  Cry.  Gchat with Mr. JP for moral support.  Return to step 1.

Meanwhile, roast a head of garlic.  When the polenta has cooled enough, cut it into squares and fry each one in oil (or put under the broiler to get the top nice and crispy).  Top with roasted garlic and slices of roasted red peppers, and crumble more goat cheese over the top. 

Sunday, September 12, 2010

Bloggycat's paw paws and grilled polenta cakes

I'm getting a nice list of really cool blogs to follow, don't you think?  I feel like a copycat, or in this case, a bloggycat, but these fantastic bloggers just have the BEST ideas! 

The amazing Paw Paw fruit
In the spirit of Poor Girl Eats Well, I decided to see what I could do for a few bucks at the food co-op and farmer's market this weekend.  Of course, having Mr. JP with me always seems to make the bill go up (not because he puts things in the cart, but because he is a good partner in crime!), so we weren't able to come even close to the $25 shopping cart, but we got some pretty neat stuff from the bulk bins and the farmer's market.  The thing that really busted the budget: paw paws. 

Our favorite fruit, not sold in stores because of their extremely short shelf-life, easy bruising, and their need to ripen completely on the tree (so they can't be shipped raw and gassed later), shows up this time of year for about one week, and then it's a long, long wait until we can have more of the tropical tasting custard-like fruit.  So, of course, we bought every last paw paw and some paw paw cake, along with Honey Crisp apples, peaches, and some Asian pears.  I have a weakness when it comes to locally grown fruit.  Good thing Mr. JP had a few extra bills in his wallet!  What I did get for cheap, though, was a whole bunch of different colored sweet peppers, and a few blazing inferno hot peppers for my salsa and green tomato pickles.  I could have walked out of the farmer's market for $4 if it hadn't been for those paw paws!

I've been seeing a lot of recipes for polenta recently, and I really want to try my hand at making it, but none of the recipes seem to be too clear on whether I should use cornmeal or corn grits.  I looked for something like a box that said "Polenta" on it at the store, but didn't see anything other than Bob's Red Mill corn grits that said it was also known as polenta (and also known as "Holy Cow that's expensive grit!")  So when I was at the co-op, I got some corn grits.  I'm going to try my hand at making Grilled Polenta Cakes with goat cheese (minus the caramelized onions because I forgot to buy onions).  I hope they turn out well enough to cut out of the pan and fry up to get that crispy crust on them!

It's much easier being green

It seems like by the time the tomatoes get ripe, they are already starting to rot in places or they are infested with worms.  I've had it with wasting my time any longer and have decided to ransack the bushes for the green fruit.  I have a few projects up my sleeve, but the first one was for green tomato dill pickles.  Pickles are one of my very favorite foods.  I could eat just about anything in pickled form, and I was planning on putting up many quarts, but since the pickling cucumbers got devoured by "Audrey" the squash vine, I thought I would just have to wait until next year to start over again.  Here's where a blessing called "bad ripe tomato luck" and a Google search came in!  Here's a link to the original recipe, and my modifications are listed below:

Kosher Dill Green Tomato Pickles
The brine:
3 3/4 c. water
3 3/4 c. vinegar (5%)
6 tbsp pickling salt 
Put this in a saucepan and let it come to a boil

Slice up:
Green tomatoes
Sweet Peppers
Onion
Carrots
Celery
Hot peppers (Optional)

Add several cloves of sliced garlic to the bottom of your jars and start to pack in the veggies.  Stuff a few sprigs of dill in, and fill the jars with the boiling vinegar solution.  Leave about 1/2 inch of head space.  Put lids on and process in a hot water bath 10 minutes for pints and 15 minutes for quarts.  Pickles will be ready to eat in 4-6 weeks.

I had a little brine left over, as well as some diced veggies, so I just tossed them all together and let it sit on the counter for a quick little pickling session.  The first taste left some fire on my lips and a pucker in my cheeks, so I think this is going to be a pretty good batch!

I plan on using this mixture in sandwiches.
Everything floated to the top, which won't earn me a blue ribbon, but I'll put the picture in anyway!

Tuesday, September 7, 2010

Trouble with muscle food

Mr. JP has a healthy obsession with weight lifting and nutritional supplements, but today he found out that his most recent purchase of protein powder is actually laden with heavy metals like lead and cadmium!  I think this has him convinced to try to get most of his protein from food sources instead of powders and supplements.  We eat a lot of protein in our diets already, but since this man can eat us out of house and home, we are going to be needing some cheaper sources of protein than the farm-raised chickens and eggs we get from Jehovah Jireh Farm.  It's a good thing beans are cheap, and I'm learning how to sprout them for even more tasty possibilities!  My very first sprouting experiment: chickpeas.  I ate my first little baby sprouted chickpea today, and it was absolutely delicious.  It tasted just like a tender young pea from the pod--one of my very favorite foods!  Hopefully, eating sprouted raw foods will help counteract the pie we had for breakfast, lunch, and dinner over the holiday weekend!

Pictures will come in a few days.  I've been having trouble with Mac vs. Canon, so Mr. JP bought me a new handy dandy device that will let me get my pictures to the computer a lot easier.  It probably has lead in it, but we're not planning on putting it on the dinner plate any time soon!

Sunday, September 5, 2010

Seeing the world through raspberry colored glasses

Yesterday Mr. JP and I went out to our favorite pick-your-own orchard.  We spent a sunny morning in the raspberry fields filling up our two little quart containers, which I found out after about 10 minutes was not nearly enough to satisfy my industrial-picking-mode mindset!  Mr. JP just leisurely strolled along the rows picking only the very best berries, with careful consideration on each one that would make it to his basket, while I worked quickly down the rows picking everything that resembled ripe and not already nibbled on.  That just demonstrates our two very different personalities.  We will be eating his berries for anything requiring fresh, and mine will be perfect for making jam.  Don't tell Mr. JP, but I'm going to need a few of his perfect berries for the jam, too!

We went there for peaches and apples, but I didn't read the website carefully enough...they don't even have peach trees, and the apples will be ready for the first picking next weekend.  Oh well, looks like we'll have to make another trip!  They have fresh milk and cream from a local dairy where the cows are grass fed.  The milk tastes so fresh, smooth, and light, and it comes in glass bottles...swoon!